Autobiographical Poem
PRE-PROJECT PREP: Make sure you have shared your autobiographical poem with Mr. Cleveland.
Step One: Select one image to represent each category of the Autobiographical Poem. You can use Google images or your own personal pictures. Remember they should be school appropriate. Download and save them in a folder that you will place on your flash drive and label the folder as your name. None of the images or ideas should repeat! In total, you need at least 10 quality pictures that represents and conveys the message of you.
1. Image/picture to represent your first name or simply a picture of you.
2. Image to represent one descriptive trait.
3. One personal picture to show your siblings, family, or other significant relative.
4. Image/picture to represent something/someone you love.
5. One image/picture that depicts the emotion you feel most often.
6. One image/picture to represent the object, places, people, emotions you need in your life.
7. One image/picture to represent what you give to other people (PG rated please!)
8. One image/picture to represent something, someone, somewhere you would like to see.
9. One image/picture to represent where you reside.
10. One image/picture to represent your last name.
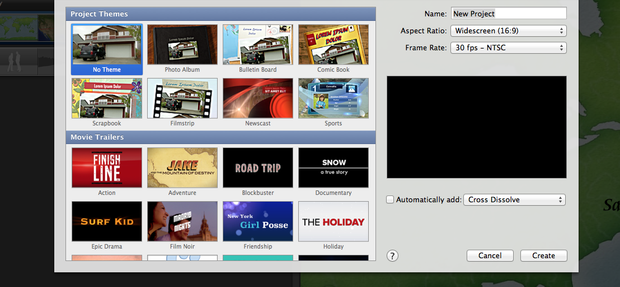
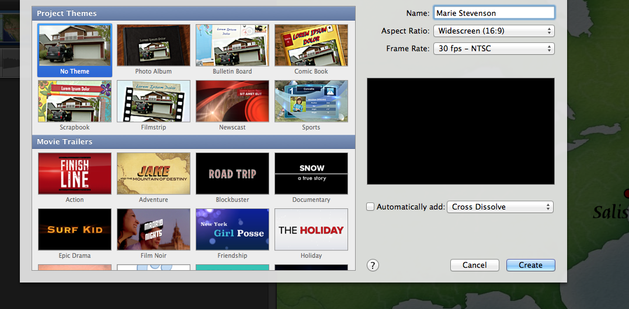
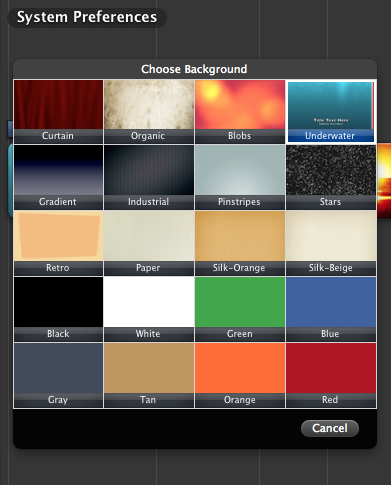
Step Two: Open iMovie...Go to File...New Project...No Theme...Name it your first and last name. Hit Create.
Step One: Select one image to represent each category of the Autobiographical Poem. You can use Google images or your own personal pictures. Remember they should be school appropriate. Download and save them in a folder that you will place on your flash drive and label the folder as your name. None of the images or ideas should repeat! In total, you need at least 10 quality pictures that represents and conveys the message of you.
1. Image/picture to represent your first name or simply a picture of you.
2. Image to represent one descriptive trait.
3. One personal picture to show your siblings, family, or other significant relative.
4. Image/picture to represent something/someone you love.
5. One image/picture that depicts the emotion you feel most often.
6. One image/picture to represent the object, places, people, emotions you need in your life.
7. One image/picture to represent what you give to other people (PG rated please!)
8. One image/picture to represent something, someone, somewhere you would like to see.
9. One image/picture to represent where you reside.
10. One image/picture to represent your last name.
Step Two: Open iMovie...Go to File...New Project...No Theme...Name it your first and last name. Hit Create.
|
|
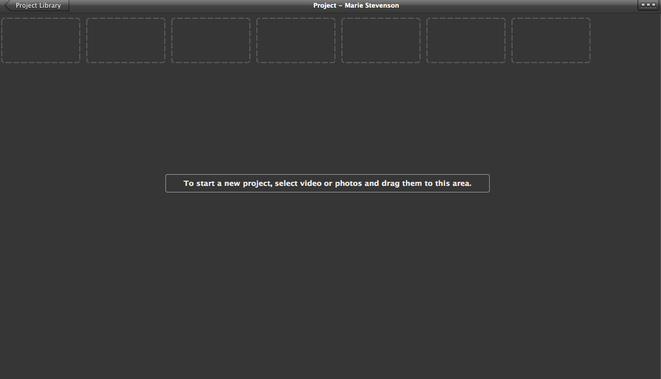
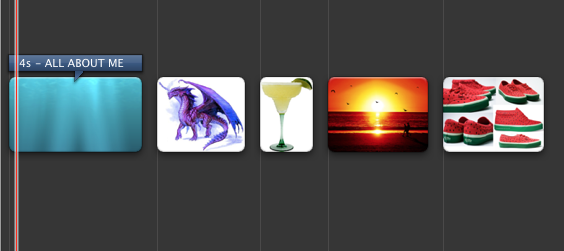
Step Three: In order of the poem, pull your images from your folder..you may need to pull them all out of the folder and put them back... (using the green line as the predictor of placement) into the New Project boxes.

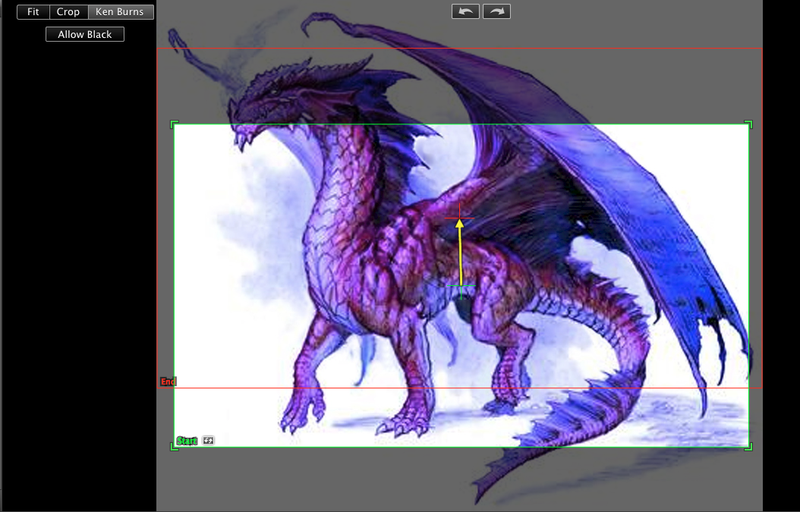
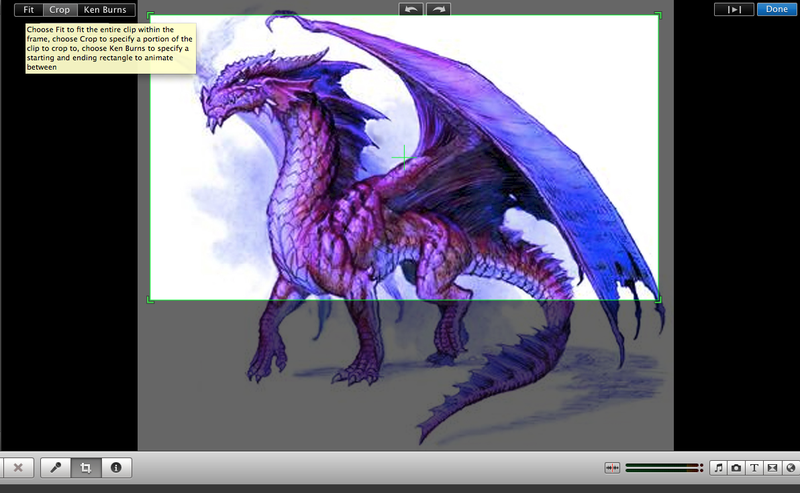
Step Four: Crop your images using Ken Burns or just crop - (Box symbol on the grey tool bar right next to the microphone)
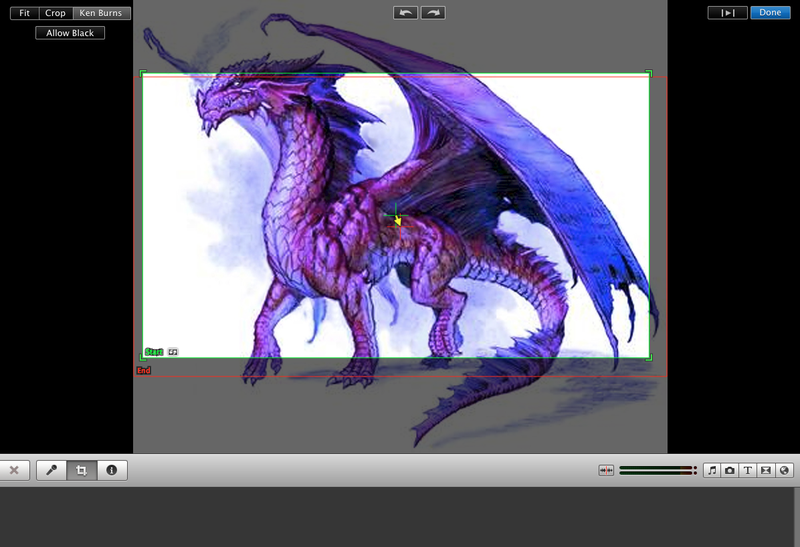
Ken Burns allows for movement in your slides. If you click on Ken Burns --there are start and end boxes. You determine the movement of the slide based upon the direction of the arrows. (SHOWN ABOVE AND BELOW)
Crop keeps the slide stationary and only allows for some of the image to be present. Crop is shown below. You decide.( CROP IS SHOWN BELOW)
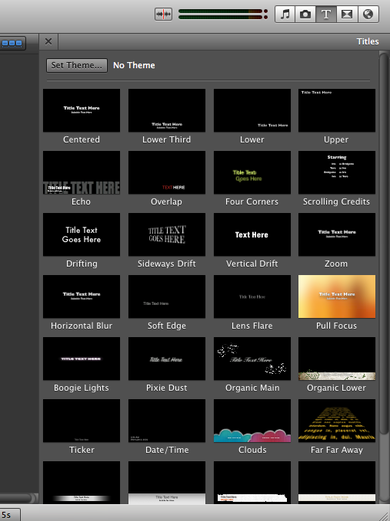
Step Five: DRAG AND DROP Text Slides for each of the categories: Lover of...Who feels…Who needs… Who gives..Who fears..Who would like to see..Resident of..
You also need a title screen for the first slide. "A Glimpse at Me," "All About Me," or something else that you find catchy and represents your personality.
Text Slides are found on the grey toolbar next to the camera button labeled as T. You have many options
You also need a title screen for the first slide. "A Glimpse at Me," "All About Me," or something else that you find catchy and represents your personality.
Text Slides are found on the grey toolbar next to the camera button labeled as T. You have many options
Step Six: Drag and Text Slides on top of images to label them specifically using the best font and placement of the label. The text slide must be placed directly over the image you selected.

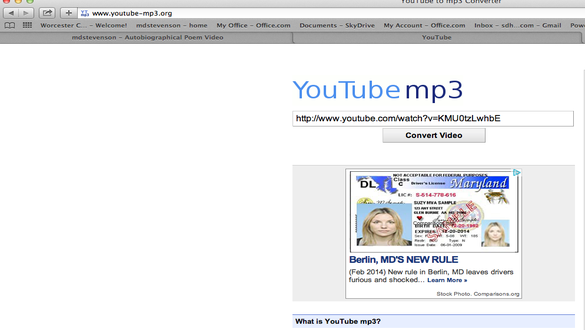
Step Seven: Open up YouTube. Then open File…. New Tab.
Use YouTube to MP3 to find download two/three songs to enhance your presentation…. No longer than 30 seconds per song.
You will need to copy the URL of your original Youtube selection into the converter. Download music directly to the MacBook.
Use YouTube to MP3 to find download two/three songs to enhance your presentation…. No longer than 30 seconds per song.
You will need to copy the URL of your original Youtube selection into the converter. Download music directly to the MacBook.
Step 8: Pull the music on to the project
(AT THIS STEP, YOU WILL NEED THE HELP OF SOMEONE WHO HAS HAD THIS CLASS TO HELP YOU DO THIS CORRECTLY)
Step 9: Export project to the desktop using Share
(AT THIS STEP, YOU WILL NEED THE HELP OF SOMEONE WHO HAS HAD THIS CLASS TO HELP YOU DO THIS CORRECTLY)
Step 9: Export project to the desktop using Share
| imovie_introduction.docx |
